
If you have already established a payment method, please scroll to “If You Have Payment Information on File“.

Once you have accessed your Settings, please select “Payment Settings” from the list on the left-hand side of the page.
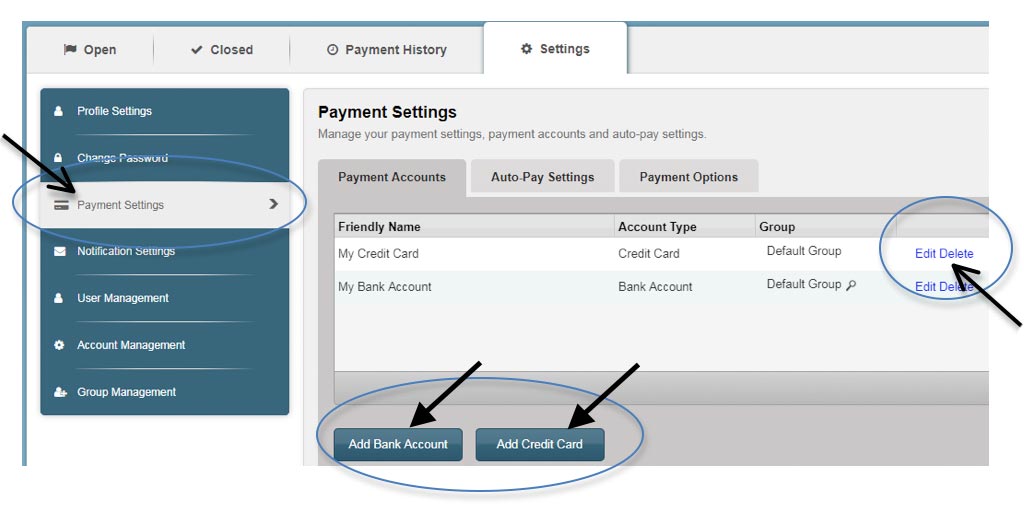
Within the Payment Settings, any saved banking information will be listed (as shown in the example above). If you have payment information on file, you may edit or delete that information by selecting the “Edit” or “Delete” links in blue to the right-hand side of the banking information. If you need to add a bank account or add a credit card, please select the “Add Bank Account” or “Add Credit Card” button at the bottom of the screen. You may add as many accounts as you wish.
Once you have selected the “Add Bank Account” button, you will be brought to the screenshot below.
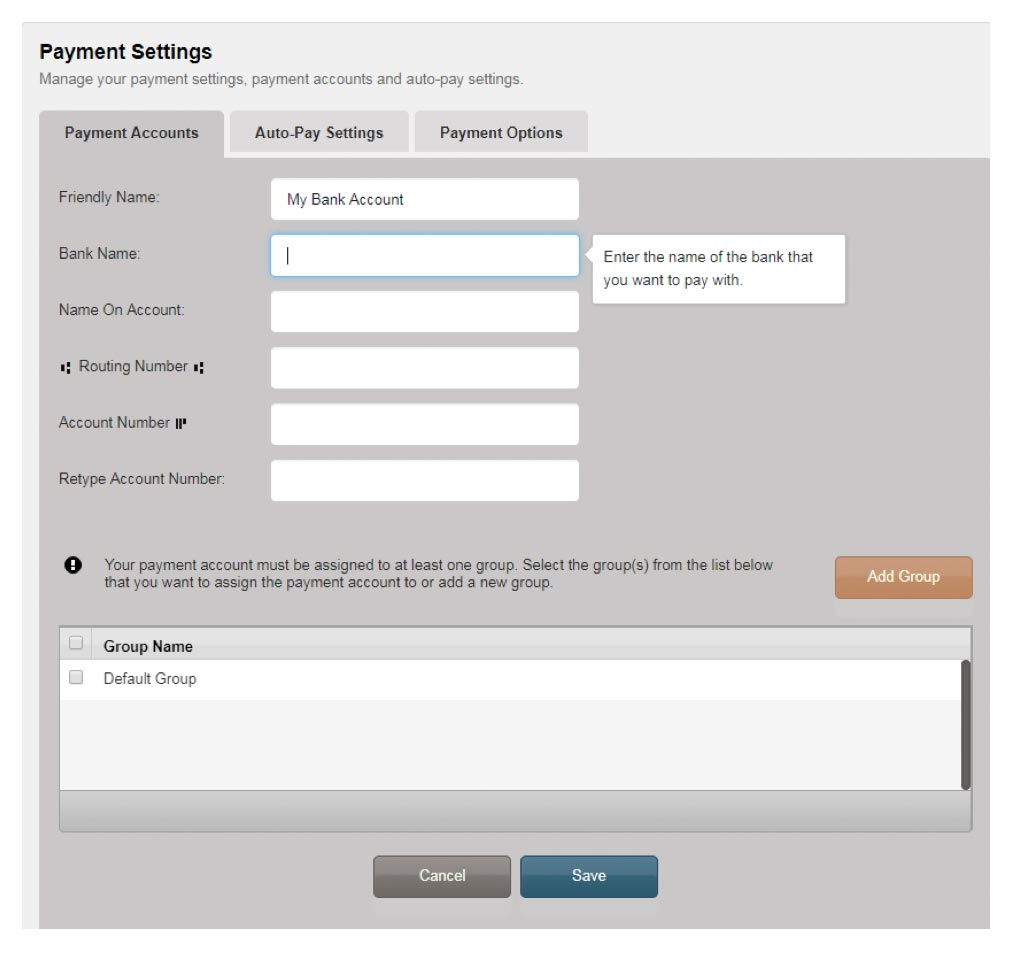
When setting up your banking information to keep on file, you must enter all fields shown above. Please change the “Friendly Name” from “My Bank Account” to some specific title or name that will help you distinguish the bank account this information pertains to.
Also, you must select a Group in the “Group Name” area at the bottom of the page. You can select “Default Group” unless you choose to add in several different bank accounts and provide specific rights and users to each account. Next select “Save.” Now your banking information will be on file when you choose to submit payments. Go back to the Open tab to view your open items in the account.
If You Have Payment Information on File
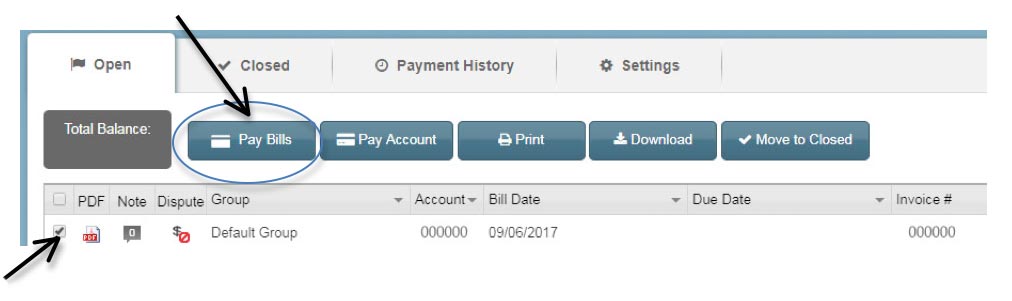
Once in the Open tab, please check the box in the far left-hand of the row of the invoice for which you choose to submit payments. Once you have selected an invoice, select the “Pay Bills” button at the top left of the page.
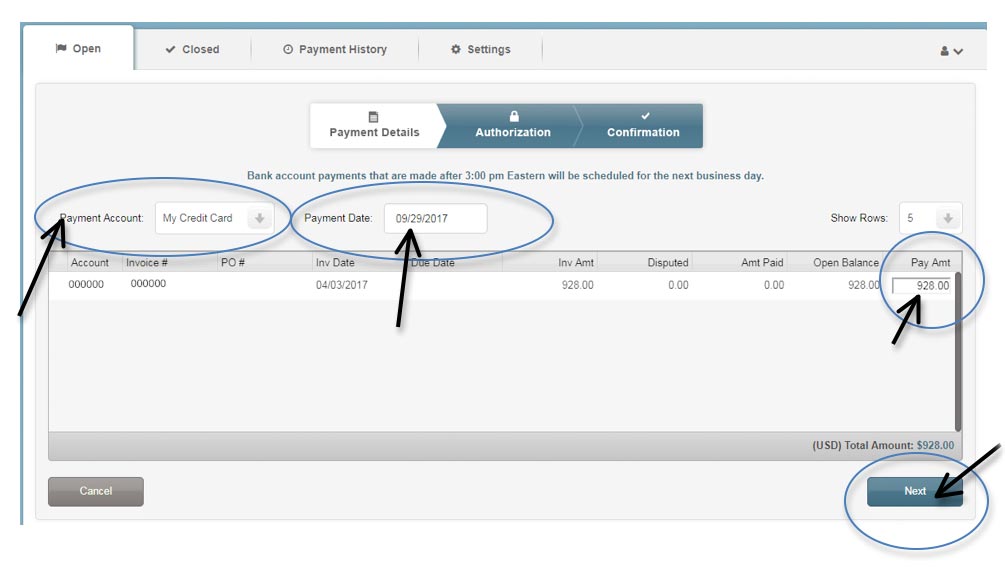
Once the Pay Bills tab is selected, you will be able to toggle between “Payment Account” and “Payment Date” as shown below. You may also edit the “Pay Amt,” if necessary, as shown to the right in the screen shot below. Once you have selected the proper payment account, date and amount, please select “Next.”
Once you have selected “Next,” you will be prompted to “Authorize” the payment you just scheduled (shown below).
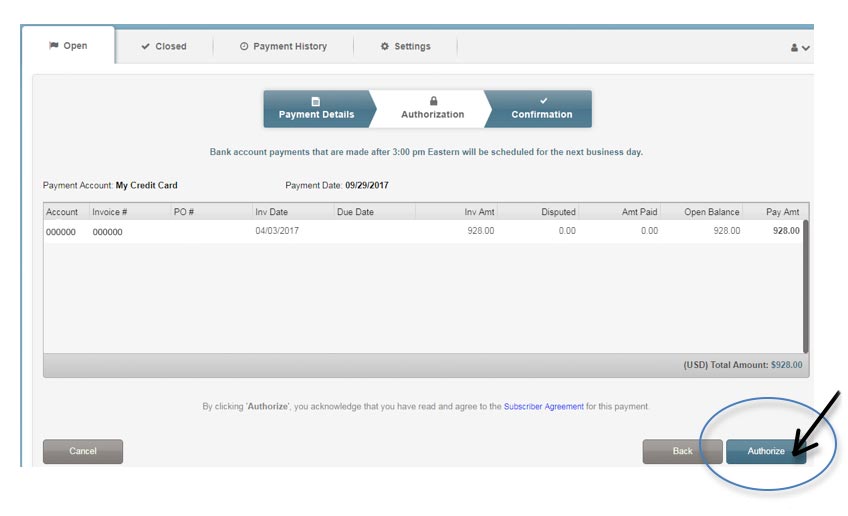
Once you have reviewed the payment information and confirm it is correct, please select “Authorize” as shown above.
Next, a confirmation will open. Here you can see the Confirmation #, Account, Invoice # and Payment Amount. Please select the “Done” button at the bottom of the screen.
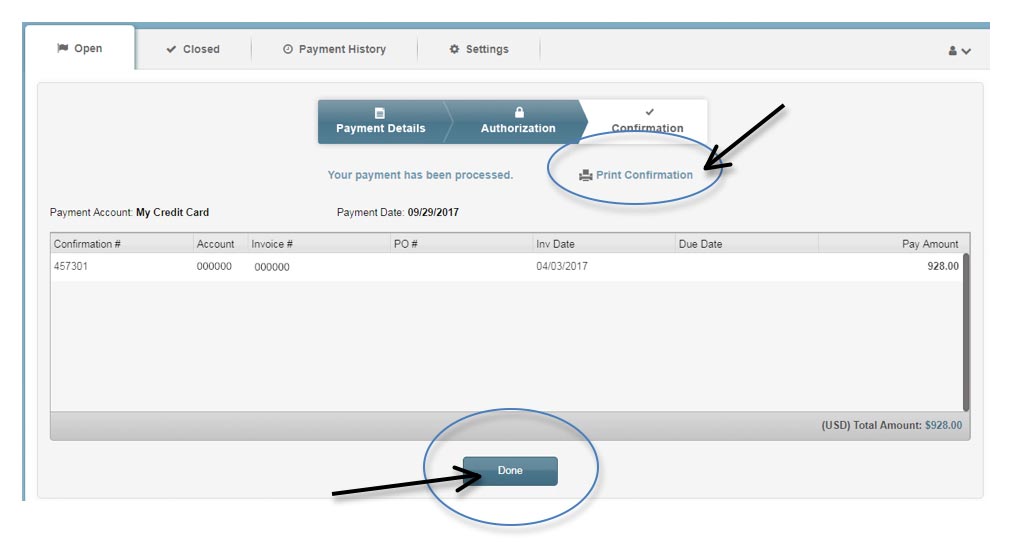
You can then choose to print a receipt/payment confirmation for your records, if desired, by selecting “Print Confirmation” at the top of the screen.